Sports venues demand reliable light, precise control, and rapid recovery during live events. When one floodlight flickers, an entire broadcast angle can become unusable. This is why learning how to troubleshoot dmx controlled sports lighting systems matters for stadium managers, electricians, and lighting designers. The problem may involve power, addressing, cabling, software, or fixture protection. It is rarely solved by replacing the brightest-looking lamp.
Industry guidance provides a practical starting point. ESTA’s ANSI E1.11 standard defines the DMX512-A protocol, including signal structure, wiring expectations, and termination principles. The standard does not guarantee a healthy installation. Technicians still need to inspect the console output, universe assignment, polarity, connectors, and the final 120-ohm terminator. One loose XLR connection can create intermittent darkness along an entire lighting run. The U.S. Department of Energy’s SSL market and energy reports also show why LED sports systems increasingly depend on networked controls, monitoring, and efficient dimming. More intelligence means more possible failure points. That is easy to forget.
The International Energy Agency continues to identify efficient lighting and controls as important energy-saving opportunities in its energy efficiency tracking work. Yet efficiency cannot replace disciplined maintenance. Begin with visible symptoms, not assumptions. Record the fixture address, control channel, error code, and failure time. Then isolate the signal path from the power path. A reflective note is necessary: even experienced teams sometimes blame DMX too quickly. A damaged power supply, thermal fault, or incorrect fixture profile may be responsible instead. This guide builds a repeatable diagnostic process, using standards, field observations, and cautious verification.
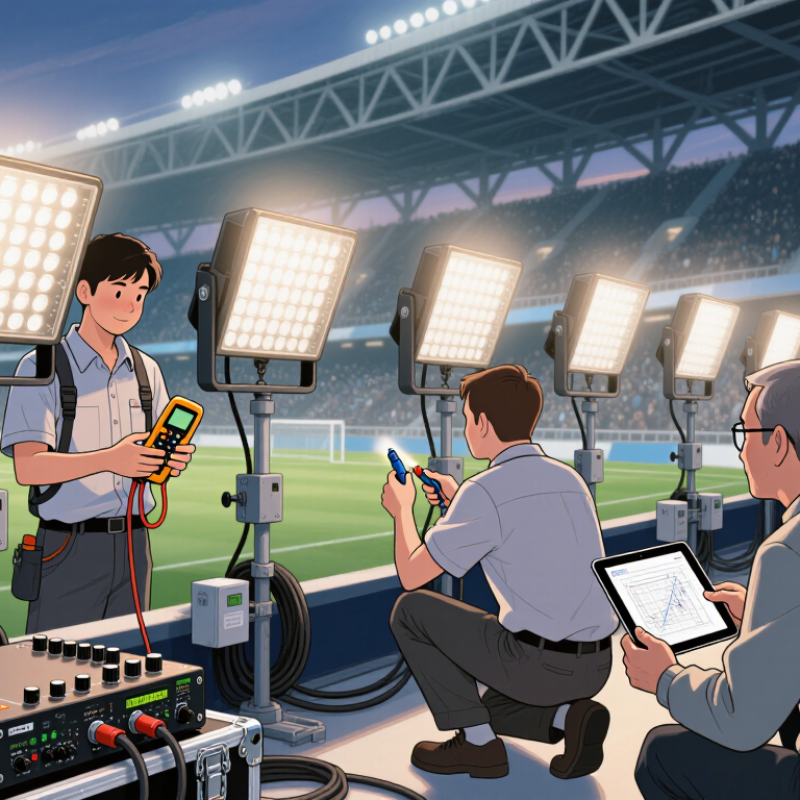
A DMX sports lighting system combines control equipment, signal cables, power supplies, and LED fixtures. The controller sends digital commands through a DMX cable. Each fixture responds to its assigned address and channel range. A reliable system map should show the controller, splitter, cable routes, fixtures, and termination point. Walk around the venue and compare this map with the actual installation. Check labels near the control rack, junction boxes, and lighting poles. Missing labels can create unnecessary troubleshooting delays.
Look for the main components before changing settings. The controller may use a console, wall panel, or automation interface. A DMX splitter can distribute signals across several cable runs. Each fixture needs power and a valid DMX connection. Inspect connectors for loose pins, moisture, or damaged insulation. Confirm addresses and channel modes match the control file. I once blamed a faulty fixture, but the real problem was an incorrect address after maintenance. That mistake reminded me to verify configuration before replacing hardware. Small errors matter.
Tips: Start with one fixture and test it locally. Use a DMX tester when available. Check signal direction and termination. Never assume a dark fixture has failed. Record every setting before changing it, because memory is unreliable. If only one cable branch fails, isolate that branch instead of resetting the entire venue.
How to Troubleshoot DMX Controlled Sports Lighting Systems?
When stadium fixtures suddenly go dark, check power before touching the DMX controller. Confirm circuit breakers, isolators, emergency stops, and voltage at the lighting panel. A loose neutral can create flicker, heat, or partial failure. Use a calibrated meter, and record readings at the panel and fixture. Uptime Institute’s 2024 Annual Outage Analysis reported that 54% of surveyed outages caused at least $100,000 in direct and indirect losses. That figure is not sports-specific, but it shows why disciplined power checks matter.
Next, inspect network connections between the control console, gateways, switches, and DMX nodes. Verify link lights, IP addresses, subnet settings, and cable locking. Replace one suspect cable, not the entire system. Then test DMX signal continuity from the source to the final fixture. Check polarity, shield condition, termination, and every coupler. ANSI E1.11 guidance supports correct DMX512-A wiring and termination practices. Use a DMX tester when possible. A simple continuity test can miss signal timing faults. I have made that mistake.
Tips: Label each universe and cable before testing. Bypass one splitter temporarily. Keep a written fault log. If one fixture fails, test the cable at both ends. If an entire row fails, inspect the gateway, addressing, and upstream signal. Leave the final terminator installed. Recheck the system after fixtures warm up; intermittent faults often appear later.
| Troubleshooting Area | Typical Symptom | What to Check | Expected Condition | Fault Indication | Recommended Action | Priority |
|---|---|---|---|---|---|---|
| Incoming Power | All fixtures in the venue are dark. | Inspect the distribution panel, disconnects, circuit breakers, fuses, and emergency-stop circuits. | The correct supply is present and protective devices are in the ON state. | A tripped breaker, blown fuse, open disconnect, or activated emergency stop. | Follow the site electrical procedure. Do not repeatedly reset a protective device that trips again; have a qualified electrician investigate. | High |
| Supply Voltage | Fixtures reboot, flicker, or shut down when output increases. | Measure voltage at the supply point and, where permitted, at the fixture circuit under load. | Voltage remains within the fixture's stated input range during operation. | Undervoltage, excessive voltage drop, loose terminals, or an overloaded circuit. | Compare measurements with the fixture documentation and correct wiring, loading, or terminal issues through qualified personnel. | High |
| Protective Earthing | Intermittent resets, communication instability, or electrical noise. | Check protective earth continuity, bonding, and enclosure connections without disconnecting required safety conductors. | Protective earthing is continuous and installed according to local electrical requirements. | Loose, damaged, or incorrectly terminated earth conductor. | Remove the system from service if a safety-grounding problem is suspected and arrange qualified inspection. | High |
| Controller and Network | The lighting controller cannot discover or control remote nodes. | Check controller power, Ethernet link indicators, IP settings, subnet, and cable seating. | The controller and network nodes are powered and use compatible network settings. | No link light, duplicate IP address, incorrect subnet, damaged cable, or disconnected switch port. | Replace or reseat the cable, correct network settings, and verify connectivity with a controlled ping or system diagnostic. | Medium |
| Network Topology | Commands are delayed, lost, or sent to the wrong lighting zone. | Review switch connections, VLAN or isolation rules, wireless links, and traffic paths between controller and gateways. | The control network provides a stable path with no unintended routing or isolation. | A blocked port, unsuitable wireless connection, network loop, or gateway on the wrong network segment. | Test one gateway at a time, simplify the path, and restore the documented network topology. | Medium |
| DMX Cable Type | The first fixture responds, but downstream fixtures behave unpredictably. | Confirm that the cable is intended for DMX or RS-485 use and inspect connectors for damage or moisture. | A suitable balanced cable is used throughout the DMX run. | Microphone cable, unshielded cable, damaged cable, or mixed wiring practices. | Replace unsuitable sections with compliant balanced DMX cable and keep data cabling away from strong interference sources where practical. | Medium |
| DMX Signal Continuity | A complete fixture section stops responding. | Test continuity of the data pair and inspect pin-to-pin wiring from the controller or gateway to the last working fixture. | The signal path is continuous, with no open circuit or short between data conductors. | Open conductor, short circuit, reversed polarity, crushed cable, or loose connector. | Divide the line at the last working point, locate the failed section, and repair or replace the affected cable or connector. | High |
| DMX Polarity | Fixtures power on but ignore DMX commands. | Verify data-plus and data-minus connections at the controller, gateways, and every connector. | The same polarity is maintained across the entire DMX line. | Data conductors are reversed at one point or an adapter uses a different pin arrangement. | Correct the termination according to the equipment wiring diagram and retest from the controller outward. | Medium |
| DMX Termination | Random flicker or unstable behavior appears near the end of the line. | Check whether a 120-ohm terminator is installed at the end of each physical DMX segment. | One suitable 120-ohm termination is fitted at the end of the segment, not at every fixture. | Missing termination, termination in the middle of the line, or multiple terminators on one segment. | Install or relocate the terminator and retest the line with all fixtures connected. | Medium |
| DMX Topology and Load | The system works during a short test but fails with the full stadium installation. | Check for star connections, excessive branches, long cable runs, and the number of connected unit loads. | The line uses a daisy-chain topology and stays within the equipment and cabling limits. | A passive star, excessive branch length, overlong segment, or more than approximately 32 unit loads without suitable signal distribution. | Use appropriate DMX splitters or repeaters, shorten branches, and divide the installation into correctly terminated segments. | Medium |
| DMX Addressing | The wrong fixture changes, or several fixtures respond together. | Compare each fixture's start address and channel footprint with the control console patch. | Addresses are unique where independent control is required and channel ranges do not overlap unintentionally. | Duplicate addresses, incorrect universe, wrong fixture mode, or an incorrect channel count. | Record the actual fixture settings, correct the patch or addresses, and test one zone at a time. | Low |
| DMX Refresh and Data Rate | Fast cues produce lag, incomplete changes, or visible instability. | Review the controller output settings and confirm compatibility with the receiving fixtures and gateways. | DMX512 data is transmitted using compatible serial settings; the common DMX512 data rate is 250 kbit/s. | Unsupported timing, excessive channel traffic, or a gateway configured for a different protocol or mode. | Use the device-recommended timing, reduce unnecessary traffic, and verify the selected control protocol. | Low |
| Fixture Operating Mode | A fixture responds only to local controls or shows unexpected colors and intensity. | Check whether the fixture is in DMX mode rather than standalone, automatic, test, or local override mode. | The selected mode matches the console patch and the fixture's channel layout. | Local override, incorrect personality, locked menu, or incompatible channel mode. | Select the correct control mode, confirm the channel personality, and save the configuration if required. | Low |
| Environmental and Physical Inspection | The fault occurs after rain, cleaning, vibration, or maintenance. | Inspect outdoor connectors, cable glands, junction boxes, fixture seals, and signs of corrosion or water ingress. | Enclosures are closed, cable entries are sealed, and connectors are dry and mechanically secure. | Moisture, corrosion, loose strain relief, damaged insulation, or vibration-related connector failure. | Isolate power before inspection, dry or replace affected components as approved, improve sealing, and retest safely. | High |
| Controlled Isolation Test | The source of the fault is unclear after basic checks. | Test the system in sections: controller, gateway, first fixture, then each downstream segment. | The fault can be reproduced and disappears when the defective section is isolated. | Multiple simultaneous faults, an intermittent connection, or a defective fixture affecting the data line. | Document each test result, reconnect one section at a time, and replace or repair only the confirmed defective component. | Low |
When sports lights respond incorrectly, inspect the controller before replacing fixtures. Confirm it is powered, connected, and transmitting a stable DMX signal. Watch the output indicator while changing one channel at a time. A frozen value may indicate software, cable, or configuration trouble. I once blamed a faulty fixture, but the controller was sending an unexpected scene.
Tips: Save the current show file before changing settings. Use a DMX tester when available. Test with one fixture connected. Label every cable and address clearly.
Check each fixture’s starting address and operating mode. A fixture set to address 10 should not be treated like one starting at 20. Confirm the controller uses the same channel order as the fixture manual. Intensity, color, beam, and strobe channels can shift between modes. Inspect for overlapping addresses, loose connectors, and incorrect termination at the end of the line. The last fixture should receive a clean signal, not a chain of unnecessary splitters.
Keep the test simple. Set intensity to a low level, then adjust one function. If a fixture changes when another channel moves, the patch may be wrong. Verify fixture settings locally, including DMX mode, response curves, and reset behavior. Some problems appear only after warm-up. Record each result, even failed tests. That detail may reveal a pattern later. Do not assume the newest component is correct. Calibration and configuration still matter.
In stadium service, faults often appear larger than they are. One failed fixture can make an entire lighting row seem dead. Start with the symptom. Is the entire network dark, or only fixtures after one point? Record fixture addresses, cable routes, and splitter outputs before changing anything. This simple record prevents repeated guesses.
Check power and control separately. A fixture with power but no response may have a faulty DMX input, incorrect address, or damaged cable. Disconnect the suspect fixture and connect a known-working unit with a short test cable. If control returns, the original fixture or cable needs attention. If not, test the splitter output and upstream cable.
Use a DMX tester when available; visual checks alone can miss intermittent data errors.
Termination problems are common on long sports-lighting runs. Confirm that only the final device has the correct terminator. Extra termination can weaken the signal, while missing termination may cause flickering or random color changes. Inspect connectors for moisture, loose pins, and strain near mounting points. Power down before opening equipment.
I once blamed a splitter for repeated dropouts, but a crushed cable near the access platform caused them. My first diagnosis was wrong. That mistake reinforced one rule: change one item at a time, then test the whole scene under real operating conditions.
Verify lighting scenes before touching the reset button. Record the active scene, fixture addresses, DMX universe, channel footprints, and fade times. A dark court may reflect a bad scene file, not failed luminaires. Check whether every fixture responds individually, then compare output against the approved illumination levels. The U.S. Department of Energy’s 2020 LED Adoption and Energy Savings report estimated 1.1 quads of annual energy savings from installed LEDs. That efficiency depends on accurate control.
Save the scene file externally. Disable automatic schedules and disconnect external triggers. Inspect the DMX cable path, polarity, connectors, and final termination. ANSI E1.11 DMX512-A supports up to 512 control slots per universe, but practical systems become less reliable when addressing is poorly documented. Power down control processors, distribution nodes, and luminaires according to their service instructions. Wait for complete discharge.
Bring the system online in a controlled order. Restore distribution devices, then luminaires, then the lighting console. Send a simple test level before recalling the full sports scene. Watch for flicker, delayed response, incorrect color, or fixtures ignoring blackout commands. The DOE’s 2023 Solid-State Lighting R&D Opportunities report cites laboratory LED efficacies above 200 lumens per watt, yet field performance still depends on wiring and commissioning. A reset is not a cure-all. If the fault returns, review logs and scene data before replacing hardware. I have found that rushed resets often hide the original mistake.
Use these DMX512 timing values as a reference when verifying lighting scenes. A valid signal normally includes an 88 µs minimum break, an 8 µs minimum mark-after-break, and approximately 44 µs for each 11-bit slot at 250 kbit/s. If fixtures do not respond correctly, verify the selected scene, inspect the DMX signal path, and perform a complete system reset before testing again.
The system includes a controller, DMX cables, power supplies, splitters, and LED fixtures. Each fixture uses an address and channel range.
Record the controller, splitter, cable routes, fixtures, and final termination point. Compare the drawing with labels near racks, junction boxes, and poles.
Check its DMX address, channel mode, input connector, cable, and signal path. Power does not guarantee valid control data.
Test one fixture locally with a short, known-working cable. Replace only one suspected item, then test the complete lighting scene.
Flickering, random color changes, and intermittent responses may indicate poor termination. Inspect moisture, loose pins, damaged insulation, and crushed cables.
Only the final device should have the correct terminator. Extra termination can weaken signals, while missing termination can create unstable behavior.
Test every fixture individually, then review addresses, channel footprints, fade times, and the active scene. A dark court may reflect incorrect programming.
Save scene files and settings externally. Disable schedules, power down according to service instructions, wait for discharge, then restore distribution devices, fixtures, and control equipment.
Record addresses, cable routes, splitter outputs, scene data, and every setting change. Memory is unreliable. My first diagnosis may be wrong.
This guide explains how to troubleshoot dmx controlled sports lighting systems by following a structured process from the system level to individual fixtures. Begin by identifying the main components, including the controller, power supplies, DMX cables, splitters, and lighting fixtures. Check that every device has stable power, secure network connections, correct DMX wiring, and continuous signal flow. Then review controller operation, fixture addresses, channel assignments, operating modes, and configuration settings to ensure they match the intended control plan.
If problems remain, isolate each fixture and test cables, splitters, and termination points separately to locate signal loss, incorrect connections, or damaged equipment. Confirm that lighting scenes are correctly programmed and that brightness, color, movement, and timing settings are appropriate. After making corrections, perform a complete system reset and test the installation section by section. This method helps identify faults efficiently, restore reliable lighting performance, and reduce unnecessary component replacement.

Lijah Light